As the wedding drew nearer, I stepped up my pace on the gown but stopped taking the time for in-progress photos. All of the photos in this post were taken after the wedding.

The hem was the next big step. I pressed the edge of both layers - fashion fabric and lining - where Stefanie had pinned it, then removed the pins. I was using a hemming technique that I learned at the Costume Design Center - we use it for hemming men's coats. I love this technique because it hems the outer fabric and lining in one, with the seam allowance safely encased inside. It's also very simple. I plan to do a step-by-step tutorial with photos after this post.
I actually messed up the first time I sewed the hem, because I turned the skirt inside out and then pinned it together. When I turned it right side out again, I ended up with a Möbius strip mess. :p So I unpicked the whole thing, matched up all the seams and pinned them together before turning it inside out again through the small opening I had left at the side when I sewed the neckline edges together. I re-sewed the whole thing, turned it back right side out and this time it was perfect. :) I turned in the edges of the side opening and stitched them together by hand. Then came the complicated task of figuring out the closures on this side.
The following photos show how I get into the dress (with instructions in parentheses), and will help explain how I added all of the fastenings:
 |
| For these photos, I put it on over my corset (which the lovely Stefanie bound for me!) and yoga pants, for modesty. |


(Then wrap the front bodice over to the left side)
 |
| Ok kids, this is where it gets complicated. |
I had left the box pleat in the overskirt over the left side seam unstitched so that I would be able to get in and out of the dress. I put the dress on, pinned the pleat in place, and marked where the folded edges would meet. I added snaps to hold the pleats closed, but ended up replacing one of them later with a skirt hook for a tighter fit. Though I actually never removed that snap. :p
(First snap the back half of the box pleat closed)

(There's a hidden snap here pulling the inside of the front half of the pleat to the center.)

(Finally hook the front half of the pleat over to the bar, hidden beneath the edge of the bodice when closed.)

I also used skirt hooks to fasten the left side of the wrap front to the left side seam of the bodice.
This was a little tricky, as I had to also account for the folded-under lower edge of the back bodice piece, so it became somewhat like a puzzle that had to be assembled in the correct order.

I needed this little piece at the bottom to attach to both the skirt and the front bodice, then bring the wrap front section over and attach on top of it. I ended up using two smaller hooks and two thread loops - one on the skirt and one on the bodice - to accomplish this. Then a skirt hook on the wrap section covered it.
(Hook small hooks to thread loops)


(Hook wrap front to side seam)

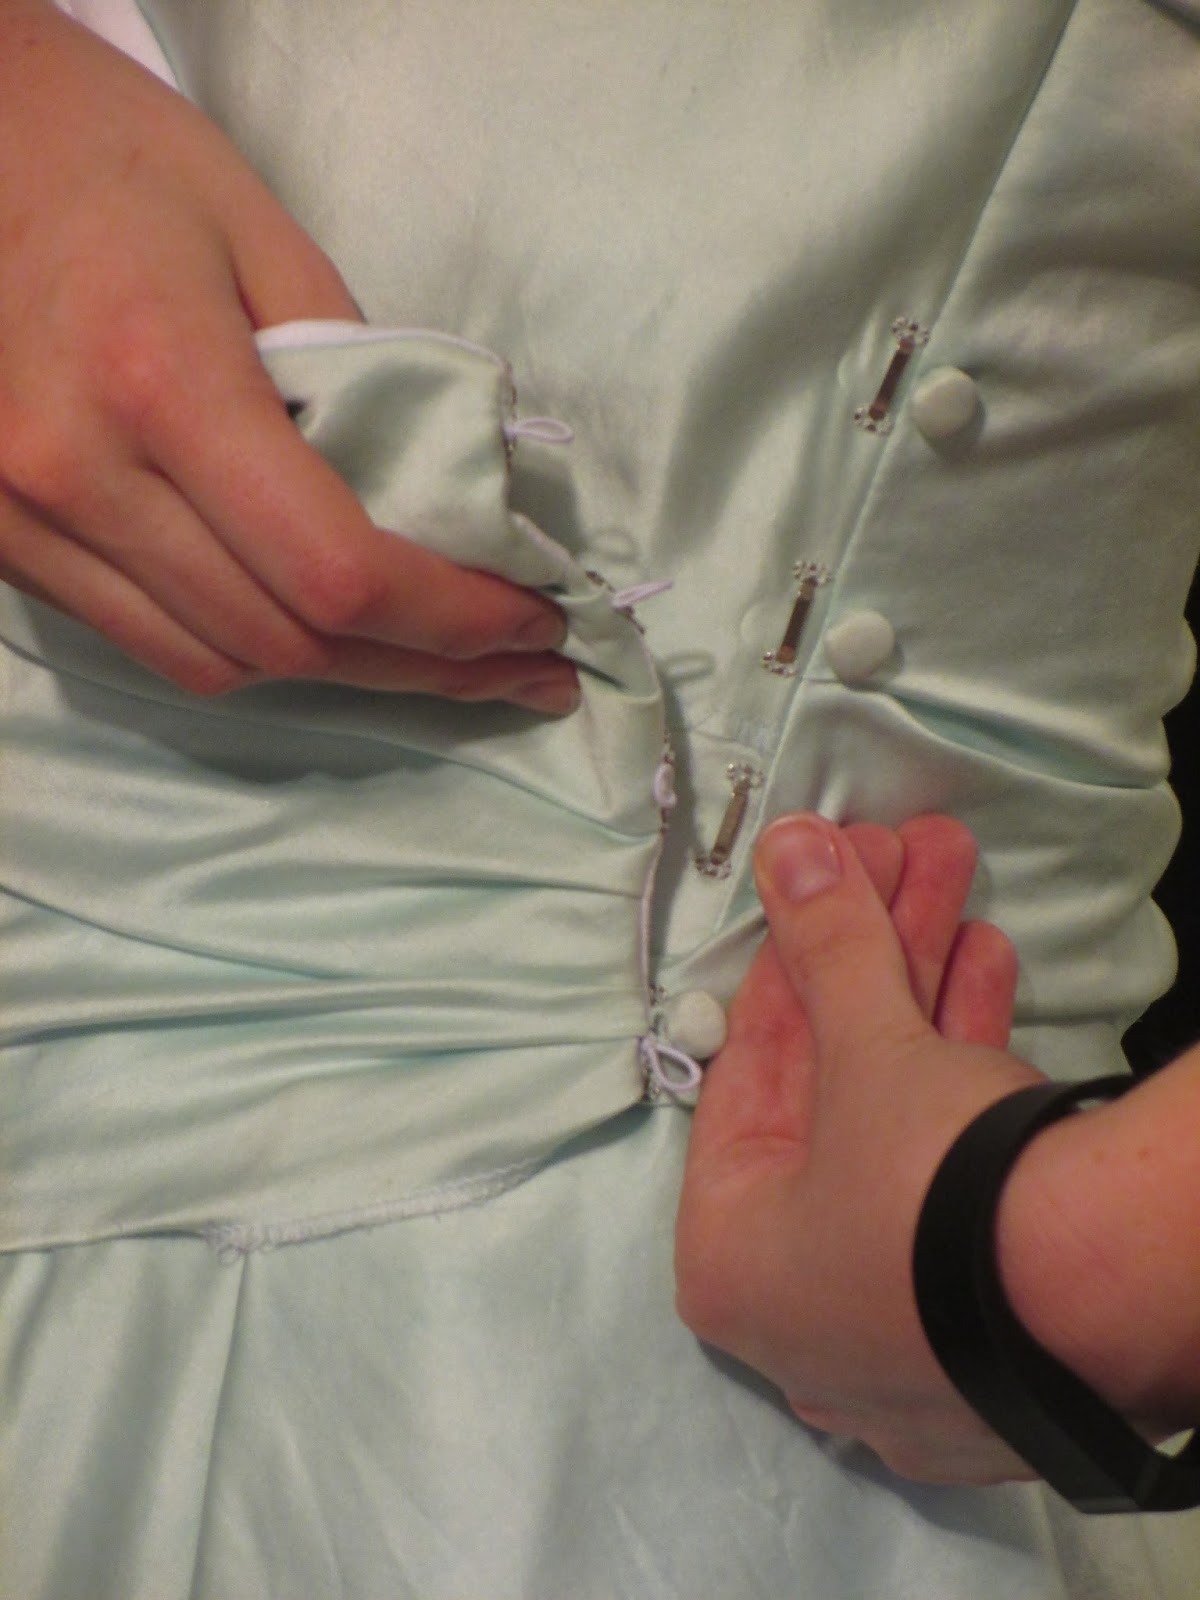
In order to disguise the skirt hooks and to match up with the right side of the bodice, I added four more covered buttons just on the other side of the left side seam. The very last step on the dress was actually done by my sister (also my Matron of Honor) Elise, who made tiny elastic loops and attached them to the edge of the wrap front hidden beneath the skirt hooks they were there to help cover.
(Pull elastic loops over buttons.)

With the elastic loops over the buttons, the side closure looks very smooth and elegant - at least I think so. :p


I had debated adding this detail and leaving it plain at the front of the skirt under the overskirt, but I think the ruffle really adds a little something that was missing. I hemmed my triangular piece by hand before attaching it, which made the sewing a lot easier. Then I didn't have to guess how the finished hems would line up! I left the top edge as it was, since it was the selvage and I didn't want to bother with hemming it and just creating bulk at the top edge of the ruffle. I measured the length of the top of the ruffle and the space I wanted it to fill, did a little math, and came up with the spaced box pleats (I have a thing for box pleats - can you tell?) that brought it to the right length to fill the space. Then I pinned it in place, matching up the two hems at every pleat juncture, and stitched it on by hand.

And with that, the dress was done! Finally! :D


All that remained was figuring out the train, and I waited until my parents arrived from Iowa on the Monday before the wedding so that my mom could help me with it. She was able to make observations of the train with me wearing it, which I couldn't do very well on my own. We ended up using Stefanie's suggestion about supporting the waistband in the back with some nice thick Pellon interfacing, which worked beautifully. I cut a crescent-shaped piece that we sandwiched in between the waistband and the pleated layers of silk, and my mom pinned it in place when I tried it on. We decided to sew through all the layers on the machine with vertical rows of stitching to reinforce the pleats and keep them firmly secured to the interfacing and waistband. It worked beautifully, and Elise also attached the skirt hook to the waistband for me while I worked on my veil - another story for another post!


