Showing posts with label Mockups. Show all posts

Thursday, January 22, 2015

Progress! (Part 2)

1/11/15 - After the holidays, I had more time to sew again.  I finalized the draping of the bodice after much fiddling and tweaking.  (Thanks to Stefanie for your help!)  I then hand-basted all the tucks and folds down just inside the seams of the foundation.


Then I took those seams apart and smoothed the excess silk over the seam allowances, and stitched them back up.  Once this was done, it was time to start putting the skirt together!  I had cut it in three pieces - the gathered side drape, the curved overskirt, and the diagonal ruffle.  I started with the side drape.

You will remember from Part 1 that I was using the full width of the fabric, which I measured at 57".  I gathered it down to just under 12".  Even with two rows of gathering stitches, it did not go willingly!  I wanted a smooth, straight drape, but the fabric has too much stiffness for that.  The gathers gave it a certain puffiness at the top, which was decidedly not what I was going for.  To rectify this, I rolled the panel tightly into a tube, securing it with a hairtie right at the gathers.  I then slipped the tube into the leg of a pair of pantyhose and threw it in the dryer for 20 minutes.


I don't have any "before" pictures, sorry.  But the treatment did have the desired effect.  I now had soft vertical creases all along the panel and the puffiness was eliminated.


To reinforce the creases, I slowly rolled the hairtie down the entire length.


I attached the panel under the edge of the bodice.


Look, I'm totally wearing my wedding dress! :D

The red buttons are just temporary placeholders.
It looks green in these pictures, but that's either the lighting or my mirror.  Most of the time it looks blue.


It's very difficult to get good pictures of myself in the dress when my regular photographer is not allowed to see it.  :p


1/19/15 - I used some leftover blue muslin to line the curved overskirt.  I sewed the silk and the lining together at the hem, then stitched the seam allowance to the lining.  This gave me a nice finished edge, though once I started pinning it to the foundation I had to adjust the length in some places.  The two layers did not drape evenly on the bias.


I'm still unsure if I'm going to add the diagonal ruffle or not.  If I do, it will fill in the space below the curved edge of the overskirt.  I'm going to play with it and see if I like how it looks, but I might just leave it off since the foundation is covered with silk anyway.

The foundation hem is currently pinned up out of the way so I don't step on it.
And that brings us up to date!  I need to add the lining, make buttons, and hem everything, then make the train.  But progress is being made!  :D  

Wednesday, January 21, 2015

Progress! (Part 1)

I know I haven't updated in forever, but I actually have been sewing!  I just haven't had much computer time for blogging, and then of course last night I had this post almost finished except for two pictures, which I tried to add during my break at work today, but my computer couldn't find the internet.  Then my browser died, and I lost the entire post.  :(  So we start again!

Here is what my dress looks like today:


Tuesday, November 25, 2014

Second Mockup

I have a dress-shaped thing!  :D  It's in my sewing room.  It's pretty.  :)

Wanna see?

Of course you do!  I'm going to be mean and make you read the whole post first, ha!

I mean.... you get to watch the design grow and evolve just as I did, with the pictures of the final design saved until last as a reward!  :)

Anyway, I finally started my for-real-and-for-true wedding gown mockup on Saturday, when I began draping the bodice.  The fabric I am using for this mockup is actually the fabric I was originally going to use for the gown itself.  After I got it home I began to worry that I didn't have enough (I think I had eight yards) and I wasn't completely in love with the color.  (More on this later.)  So I bought close to 12 yards of ivory silk, which I am going to dye.  (Terrified.)

But!  The original satin is working beautifully for my mockup purposes, as it has a drape and sheen very similar to the silk satin I will be using.  I started out by folding one end over on the bias, and pinning it onto Anna the dress form over my lining and corset.


I wrapped the folded edge around the neckline, as I want both sides of the front and the swag (for lack of a better word) part that drapes around the shoulders to be all in one piece.

From this point forward we will be ignoring the shockingly messy condition of my sewing room.  kthxbai
 I started giving it shape under the arms:


 And I found that the back swag was puckering funny from where I had pinned it to match the neckline of the lining:


So I released the tension to let it lay smoothly:


Now the fun part!  I started adding tucks and pleats along the sides to give that lovely diagonal ruched look:

Asymmetrical ruching is a big selling point, I remember from working in bridal.  It helps make the waist look smaller.
For mockup purposes, I was just pinning all these pleats right onto the dress form.


After consulting my first reference image, I realized I didn't like the way all the diagonal pleats were going in the same direction.  (I'm also doing my dress in a mirror image of the inspirational gown, so that messed me up a bit.)  I reconfigured the tucks a bit to get the ones at the bottom to angle upwards from the right hip to the left waist.  I also manipulated the top of the wrapped part to create a sort of band that will carry around the back into the swag, if that makes sense.


When I had everything where I liked it, I marked the cutting line with my fabric marker, giving myself a generous seam allowance at the sides.


I also traced the top edge of the lining in the back, to get the swag to follow the line that I want.  It's hard to see the lines on this photo, but I also marked the bottom edge of the swag.


Then I unpinned everything and cut out the piece along the lines I had drawn.  I actually cut about 1/2" outside the lines, to be extra conservative.


Here's how extra conservative I was:

The pins mark the seam of the lining, and the inside marker line is approximately 5/8" outside of the stitching line.  
Here's how the swag lays in the back:


Once I could see where all the stitching lines would end up, I trimmed away the excess and got a much better feel for the finished look:


I was very happy that I was able to take it off and put it back on in roughly the same composition again.  This gives me confidence that I will be able to use the mockup pieces as patterns when I cut out my actual fabric, and successfully re-create the look that I've come up with on the dress form.

On Sunday I draped the back bodice and the skirt.  I used the same draping technique for the back as I had used on the front:


Then I cut off a length of fabric from the yardage that was long enough to reach from my hip to the floor, and pinned it onto the right side with small tucks to simulate gathers.  This design idea was stolen directly from my inspiration source, as well.

After that, I wasn't quite sure where I wanted to go with the rest of the skirt.  I started experimenting, just draping and tucking and pinning, with interesting results:


I ended up not liking it, and went out to the living room where Brian the FiancĂ© was watching tv.  I talked about my troubles (without going into detail) and he listened and gave me some helpful advice.  He said I shouldn't try to "wow" everyone with an amazing design, but just keep it simple and keep it "me."  Heartened by this, I went back to the mockup and re-draped the skirt with simple pleats:

I might add a pleated ruffle beneath the diagonal edge, or I may extend it to reach the floor.  I haven't decided yet.
The gathered panel at the right hip will get tucked under the bottom edge of the bodice on the finished gown.
I'm happy to say I like this simple skirt much better!  After all, there will be a detachable train to add extra drama for the ceremony and pictures.  But this is what the gown will look like for the reception - pretty, but still easy to dance in!

Now for the train.  This was last night's project.  I had purchased several Truly Victorian patterns in September, including the beautiful 1880s Butterfly Detachable Train pattern, and I can now wholeheartedly recommend it!  It goes together quite easily (though the directions don't really make sense until you're actually doing it) and definitely has the "wow" factor I was hoping for:


However, since this pattern was made to be worn under a Victorian bodice, some adjustments need to be made.  It would look a little funny if I just tacked the train on in the back with no transition, I think.  So I grabbed another Truly Victorian pattern I recently acquired, the 1883 August Overskirt.  I only cut out the front and side pieces, since the back would be redundant, sewed them up and attached one side of the overskirt to the train, pinning the other side in place for now.


I love how it looks from the side!  Not so much from the front.  I'm going to play with making it a bit shorter and see if I like it better.  I may also add some diagonal ruching to the top front to make it blend better into the gown bodice.

So that's my design!  Other than a bit of tweaking, I now know what my wedding gown will look like!  :D  I'm very excited.  Now onto the extremely scary bit - dyeing my fabric!  Eek!  

Thursday, November 20, 2014

My First Mockup

I actually started the process of making my bridal gown back in August, when I made my new Ivory Renaissance Gown.  I knew I wanted an off-the-shoulder neckline for my wedding dress, so I decided to use the Renaissance gown as a test-run for the pattern I plan to use as a base.  I also used the gown itself as a test-run for wearability.  I figured if I wore it all day long at a Renaissance Faire, and the off-the-shoulderness didn't bother me or impede my movements too much, it would be a success.  And I am happy to say it was!  :D

I wore an over-bodice and detachable sleeves over the basic dress.
I started with a simple princess seamed A-line gown, cutting out the pieces from an old sheet - one of my favorite sources for mockup fabric.  I sewed up the pieces, tried it on, and made minor adjustments to fit.  Then I pulled the shoulder straps down over the tops of my shoulders, and pinned in the excess as darts on the front and back.  Using the new angle of the shoulder straps, I traced the tops of the Side Front and Center Back pieces onto heavy-duty paper, marking the requisite notches so I would be able to match them up again with the full pattern pieces.

I also added to the seam allowance of the center back.
I cut out a new mockup from a different old sheet, using the new off-the-shoulder pattern pieces and making this one about ten inches shorter at the hem.  The fit was perfect this time, so the new mockup became the lining of the Renaissance gown.  I used the new pattern to cut out my ivory satin, and gave the dress a lace-up back.


I let Brian see me in the Renaissance gown because although my wedding gown will use the same pattern, it's going to look totally different!  I plan to build a base in the same manner, then drape the design onto it on the dress form.  

So far I have cut out and constructed the lining of my wedding gown!  I used approximately 2 yards of 90" wide white cotton muslin, which I had previously washed and ironed.  


I also cut additional pieces of the Center Front and Side Front patterns from the waist up, as my gown will close with a wrap front instead of a back zipper.

I stitched all the pieces together and tried it on my dress form over my corset (more on that later) and folded the extra shoulder straps over diagonally to make the wrap front neckline:


I want the two sides of the front to intersect just above the top of my corset, so I made sure to leave enough for a 5/8" seam allowance.  

I haven't added the binding to the corset yet.
The lining was a bit too big and loose.


I pinned in the excess on the side seams and the center back:


I made sure not to catch the top front piece when I pinned in the left side.

After stitching along the pin lines, I cut away the extra shoulder straps at the angle I had folded down earlier.  I lined them both up to make sure I cut away the same amount on both sides.


I also cut off excess on the bottom of the front inside piece at an opposite angle.  The short, unattached side will attach to the inside of the finished gown to keep it securely closed.


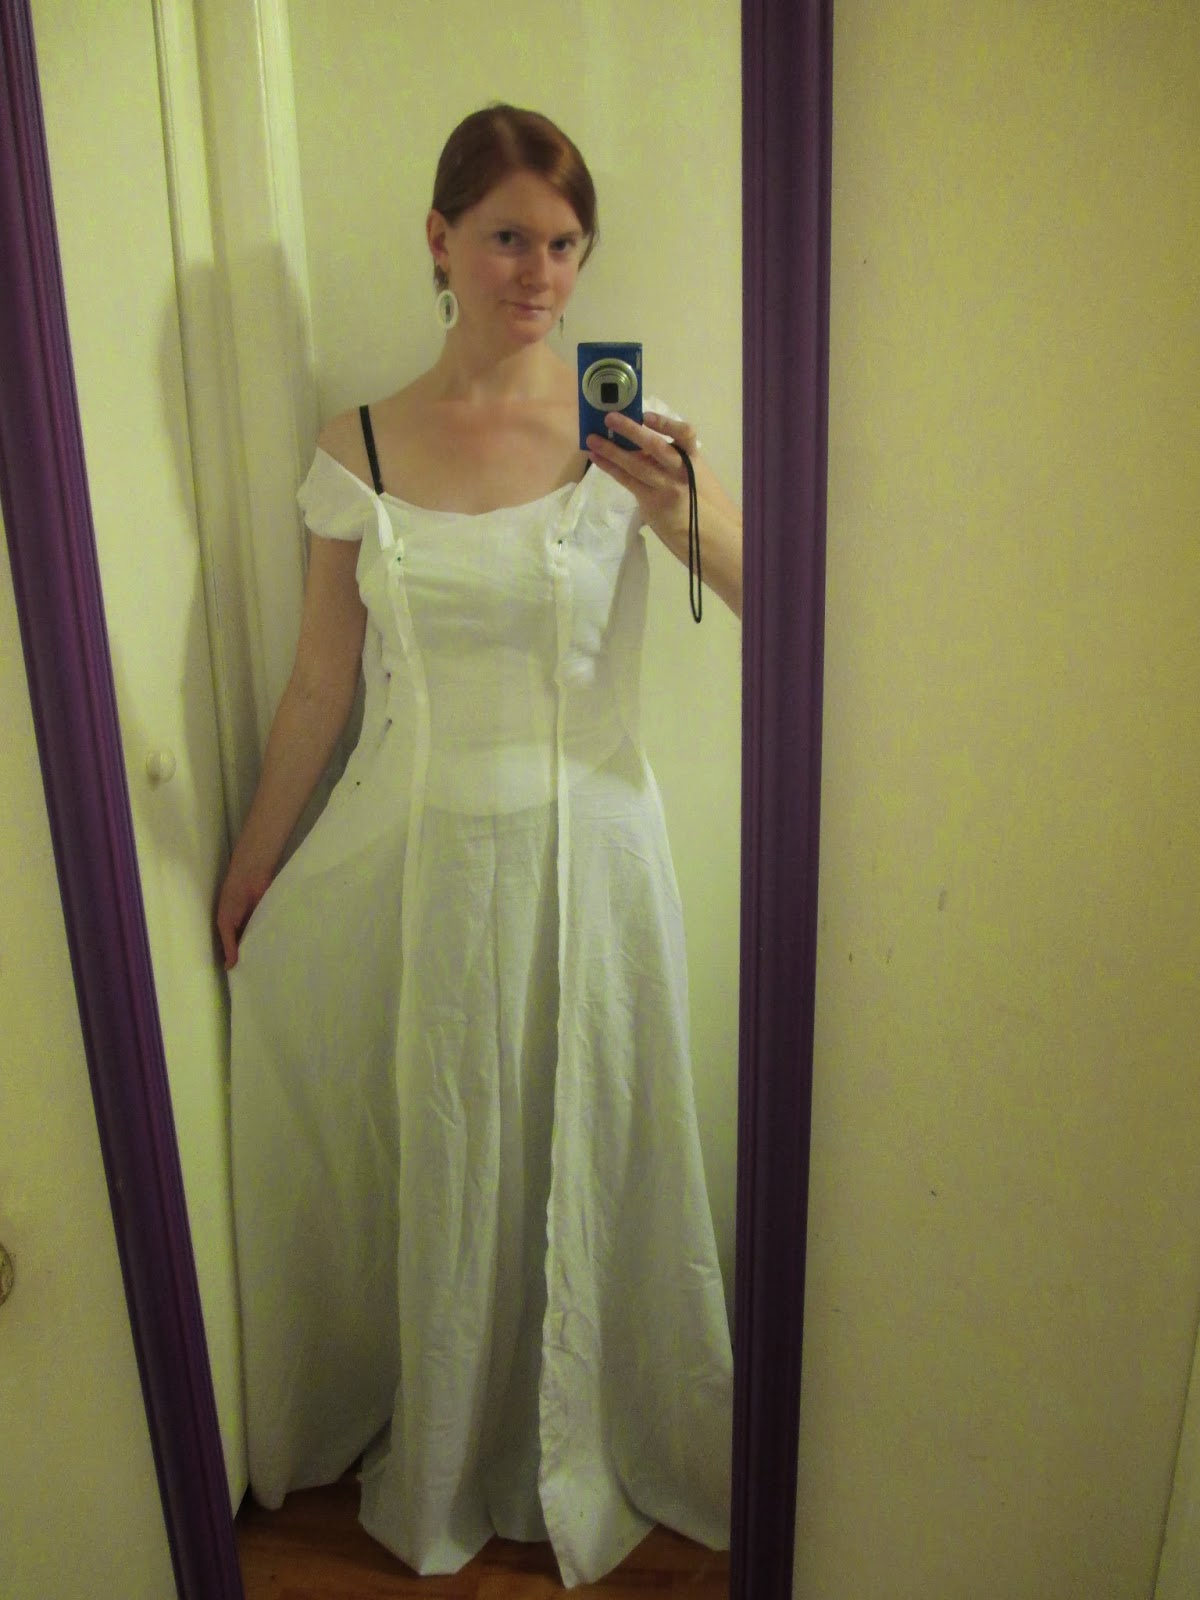
Now here it is on me!


Awkward mirror selfies are always so fun.  :p  I need to adjust the shoulder straps, as they are a bit loose and keep falling down.  I also need to try this on again over the corset, but I didn't have anyone to help me lace it.  Fortunately, my measurements are the same with and without the corset, so I'm not worried about the fit.  The purpose of the corset is comfort and ease of wear.  And the fact that I hate strapless bras.  :p

Now I just need to start draping!  :D